Uploading assets to Sama's AWS S3 bucket
Updated at March 25th, 2026
The annotation tasks that you create are most likely going to require assets, such as images and videos. Before you get started creating those tasks, you need to make sure that your assets are stored somewhere that the platform can access.
You can either upload your assets to our Sama's AWS S3 bucket, or have assets accessed from your own cloud storage.
Below are instructions if you'd like to upload assets to Sama's AWS S3 bucket directly.
Read this first
There are two different ways to upload to Sama’s S3 bucket. Choose one:
- Method 1 — AWS CLI (Recommended): Fastest and best performance for large uploads.
- Method 2 — Cyberduck (GUI): Simple drag-and-drop interface; good for smaller or one-off uploads.
Gather your Sama info
For most clients, you’ll need your Sama API key, your Project ID, and a Sama account to upload assets to the S3 bucket. Reach out to your Sama Delivery Manager if you’re missing any of these.
Method 1 — Upload with the AWS CLI (Recommended)
Tip: You can also upload assets and create tasks using the Sama CLI.
Using the AWS CLI provides the best performance for uploading assets. The AWS CLI requires Python 3.
Install Python 3
Installation instructions from Python.org
On macOS, run Install Certificates.command after installation.
Install the AWS CLI
Installation instructions from Amazon
Configure the sama-aws tool
Download sama-aws.py. Then open a terminal and run the configure command below. It creates a Sama AWS profile and fetches temporary credentials from https://app.sama.com using your API key. Credentials auto-renew hourly.
python3 sama-aws.py configure
In the command output, copy the value labeled Assets S3 URL — you’ll need it later.
Test the AWS CLI sama profile
aws --profile sama sts get-caller-identity
aws --profile sama s3 ls <Assets S3 URL>
Upload assets
This command uploads a local folder to your dedicated S3 prefix.
aws --profile sama s3 sync ./<folder_name> <Assets S3 URL>/<folder_name>
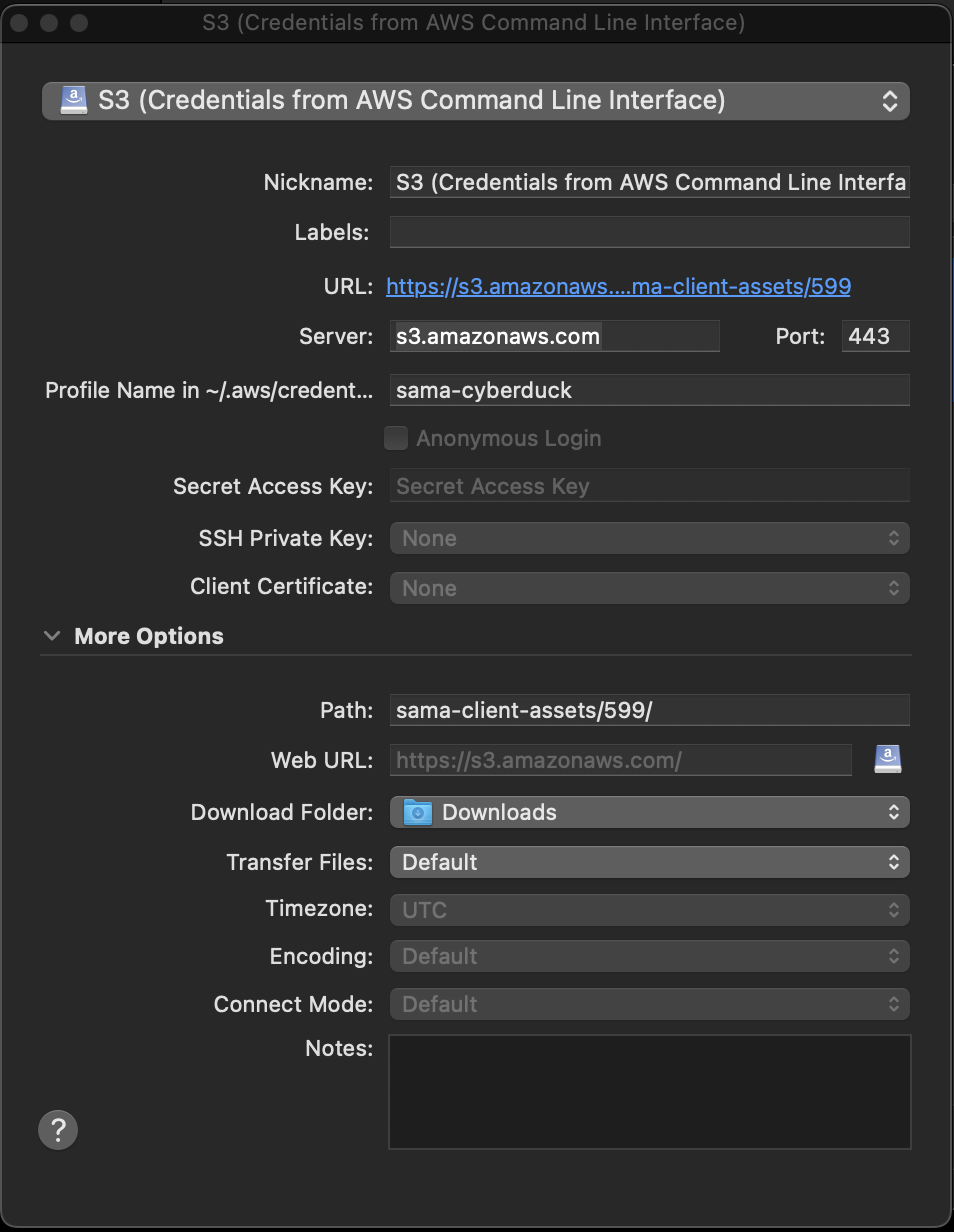
Method 2 — Upload with Cyberduck (GUI)
Install Cyberduck.
Then run the command below to create or update the sama-cyberduck AWS profile:
python3 sama-aws.py update-credentials-file
- In Cyberduck, add a bookmark for S3 (Credentials from AWS Command Line Interface).
- Set the profile name to
sama-cyberduck. - Set the Path to the value of
Assets S3 URLprinted by the configure command, without thes3://prefix.