How To | Shape Level Feedback
Updated at December 4th, 2025
Sampling, as a whole, is a concept where you define either a set number or a percentage of submitted tasks to review. Shape Level Feedback is a subset of the Sampling feature of Sama Annotate, which gives you the tools to provide specific feedback while reviewing the annotations made on your assets. The advantages of using Shape Level Feedback are:
- Improved communication in complex workloads
- Improved clarity with delivered feedback through shape and frame-specific feedback
- Faster re-work when required, as direct feedback is provided
Before you start
Using Shape Level Feedback, and Sampling as a whole, you're able to indicate errors based on a set list of available error types. If your project requires custom errors, that should be done before your project gets started, and certainly done before Sampling begins. For help configuring your custom error types, speak with the project's Delivery Manager.
Using the Sampling portal
The Sampling Portal is where you'll land before being able to launch the Review tool. To use it. First, you'll need to head to portal.sama.com and find your project:

Then, click on the project to open its dashboard, and navigate to the “Quality” tab.
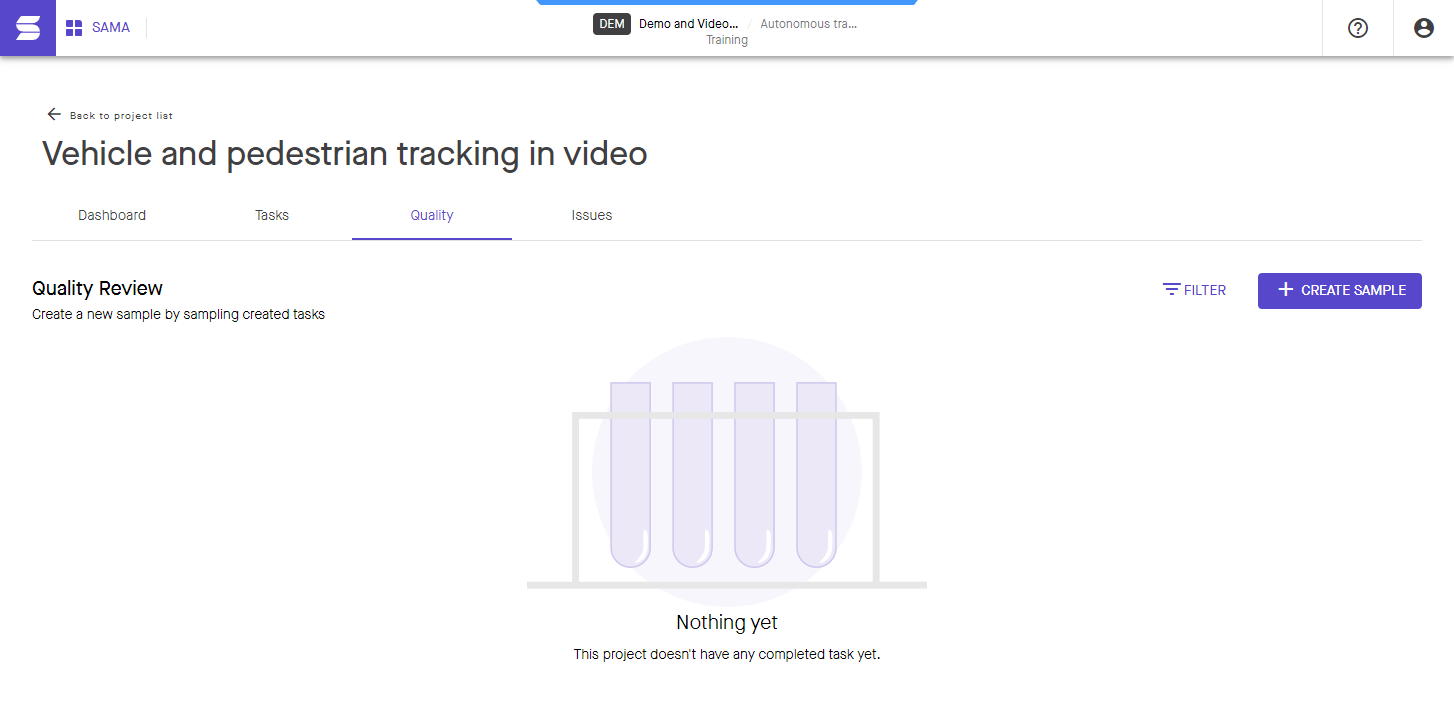
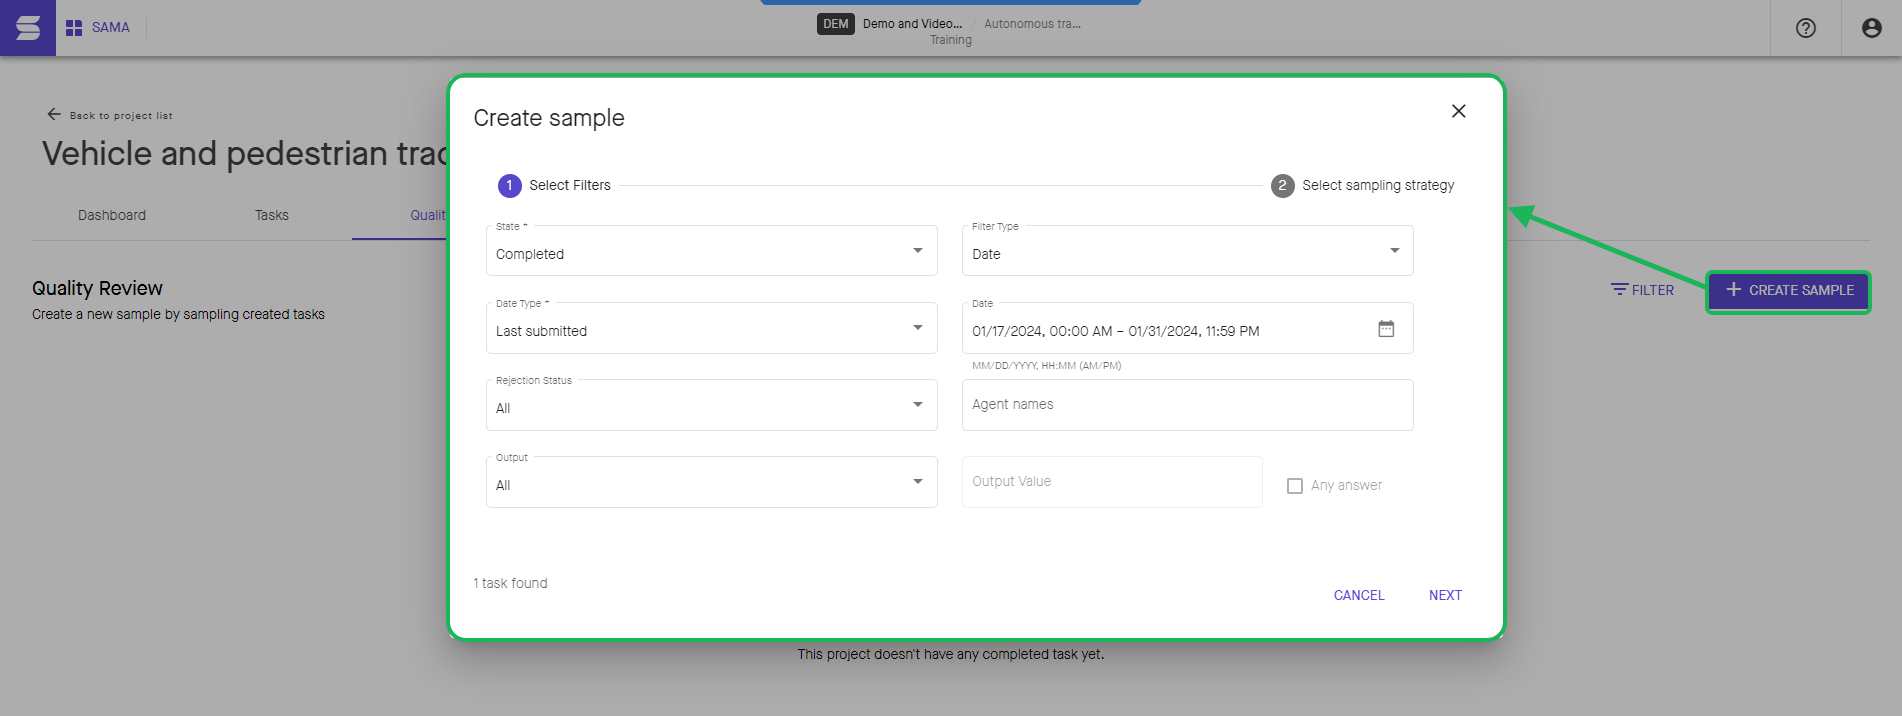
By default, no samples will exist to review. Click on the “Create Sample” button, then use the options available in the Sample Creation window to refine the tasks that will be displayed. Once the selected tasks are refined, click on “Next”.
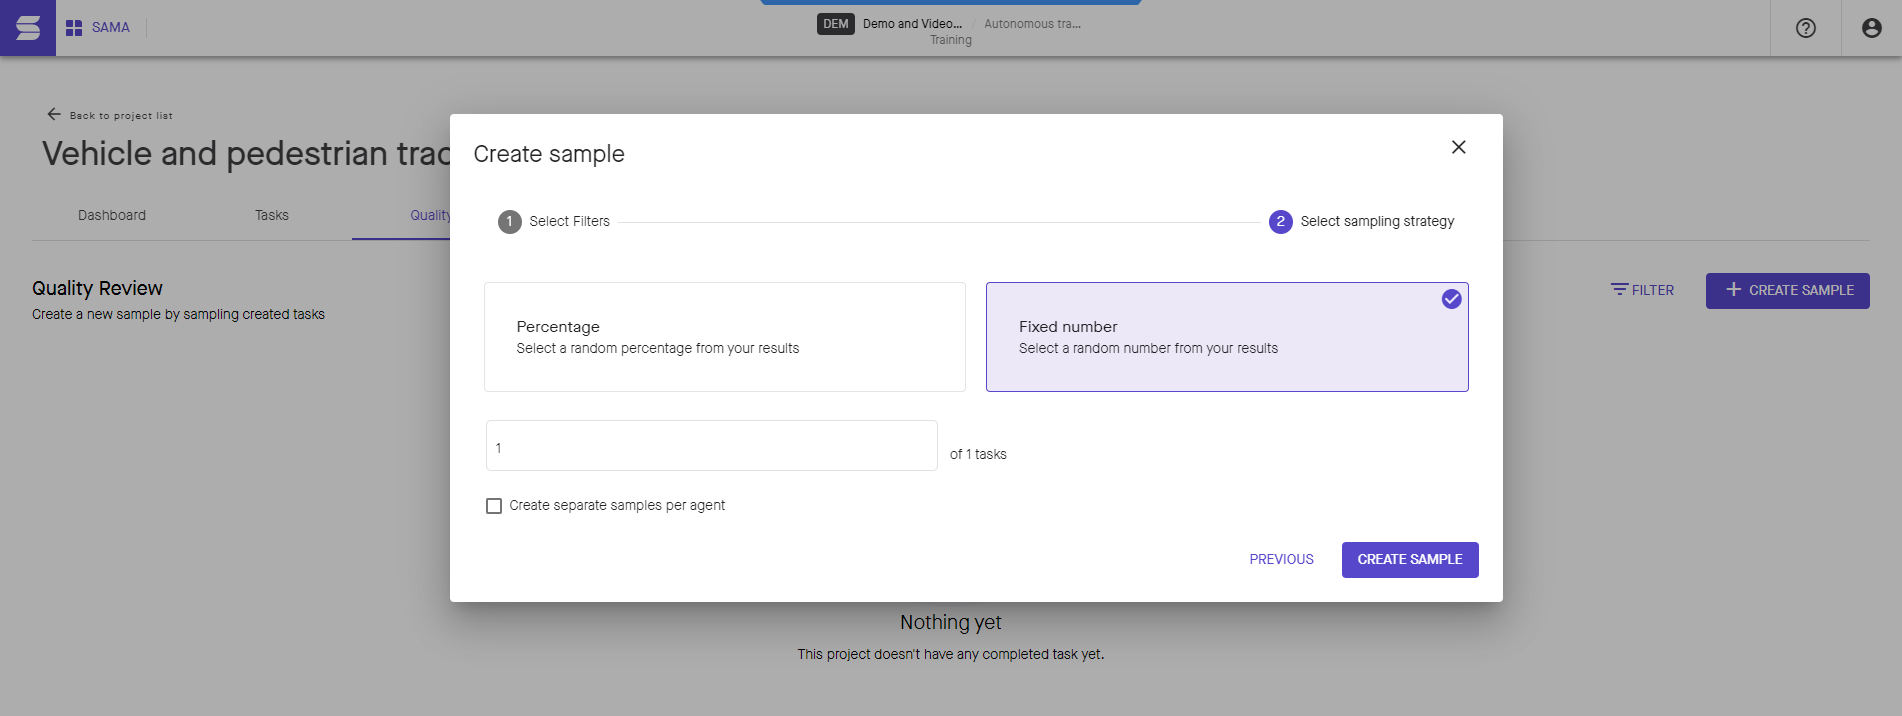
You'll now need to select the number of tasks you'll review in the Sample, based on selecting either Fixed Number, or Percentage. The filtering options are very useful for large sample sizes, so for more information, read the Reviewing Tasks article here.
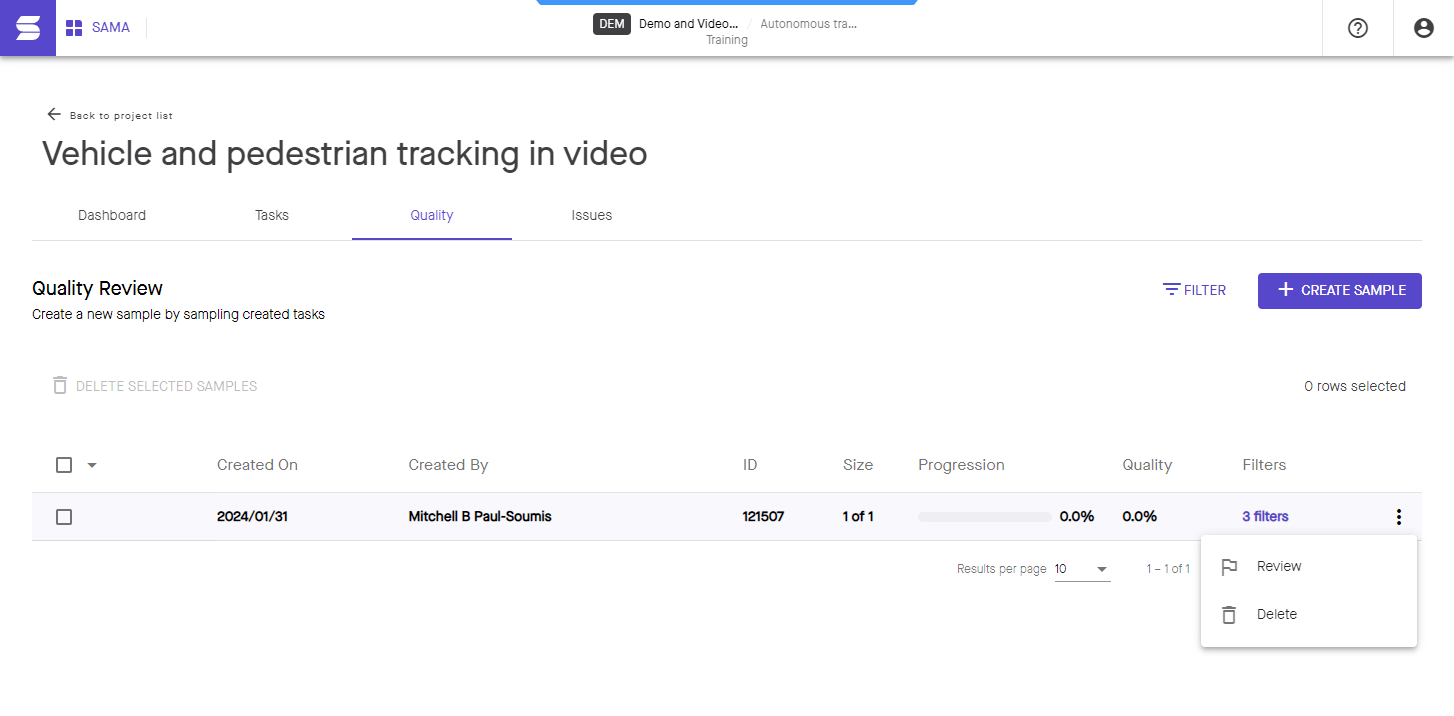
Finally, you can launch the Sample to provide feedback by expanding the kebab menu and clicking on “Review”. This menu also has an additional option, letting you delete the sample if it was made incorrectly.
Using Shape Level Feedback
Adding feedback
In the sampling workspace, users can add feedback to annotations in a few different ways.
-
For existing shapes
-
By selecting a shape and clicking on the Flag icon.
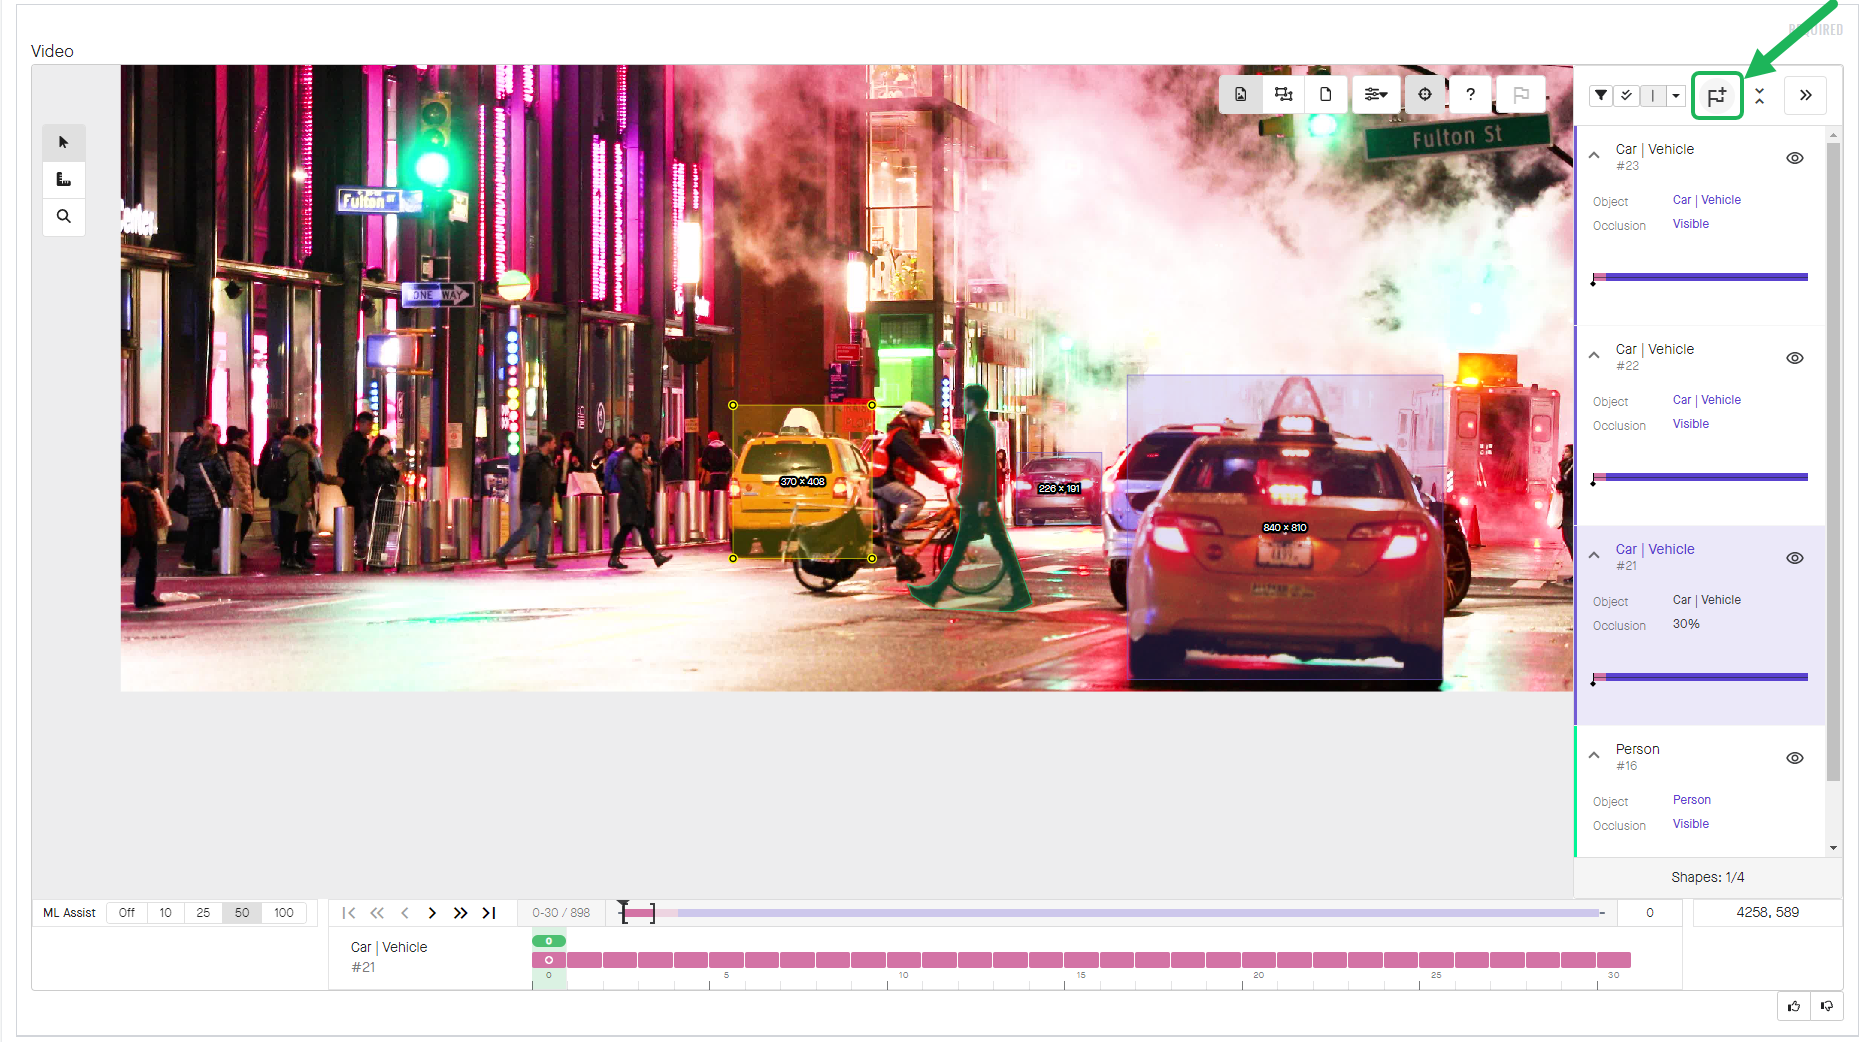
- By selecting a shape and right-clicking on the shape in the canvas to open the context menu, then clicking “Add feedback”.
-
By selecting a frame range in the timeline, right-clicking to open the context menu, and clicking “Add feedback”.
-
By selecting a shape and clicking on the Flag icon.
-
For missing shapes
-
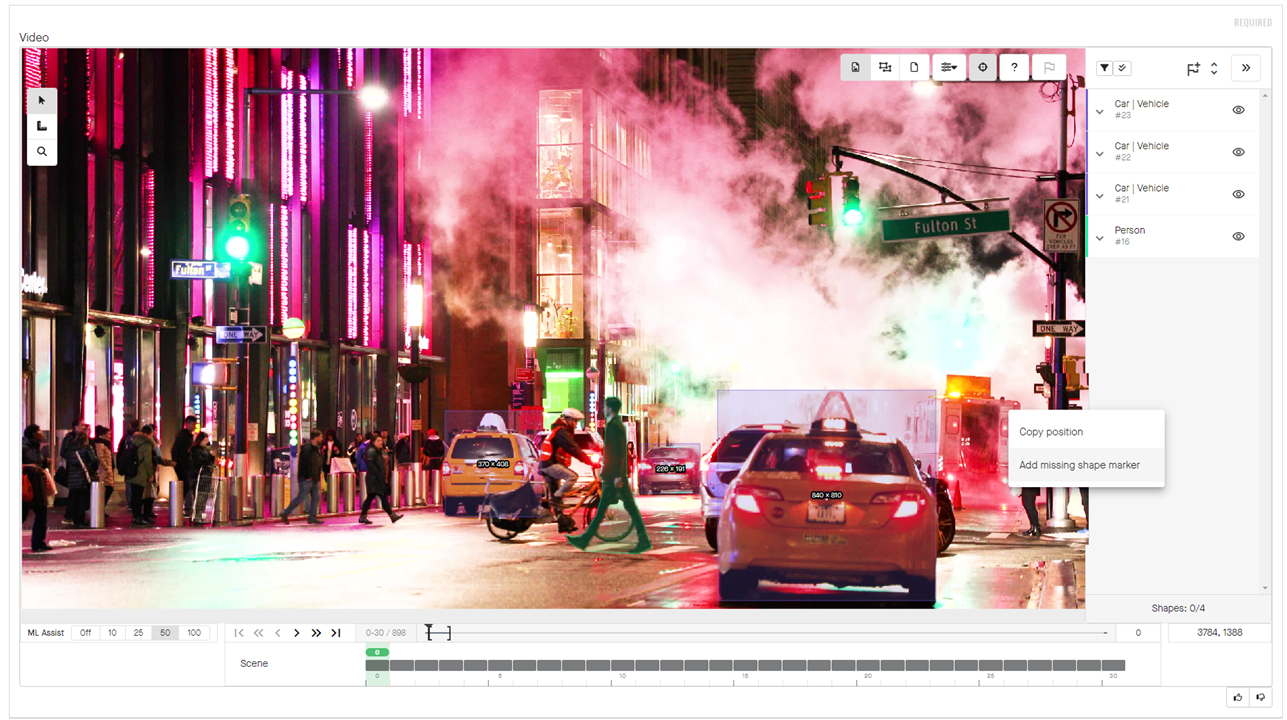
By right-clicking on the canvas to flag that a shape is missing
-
By right-clicking on the canvas to flag that a shape is missing
When submitting feedback, a menu will open up next to the shape list to configure the feedback given. The user can enter:
- The error type. If feedback is entered through the canvas to highlight a missing shape, only the Missing Shape error type will be available.
- The affected frame range. If adding feedback via the shape list or the canvas, by default the current frame will be pre-populated. If adding feedback from the timeline, the selected frames will get pre-populated. If the user selects “All frames”, the first and last visible frames of the shape will be populated.
- A comment. The user can enter a free-form comment with additional details if required.

Editing feedback
To edit existing feedback, open the feedback list and click on the kebab menu to either edit or delete the selected feedback. When editing, the same configuration options available during feedback creation are editable to edit.

